We moved into our new house in October. For the last few months I have been just over the moon with all of the extra space and room we have to stretch our legs (and toys!). Once the dust settled I looked around and realized we were severely lacking in the furniture/décor department for our new rooms. The kids are now in separate rooms (holla for coordinating naps!) but that meant I was basically starting from scratch for Harper’s room. I wanted something sweet and vintage looking but not too girly and painting was absolutely out of the picture. I just do not have it in me to paint the whole house.
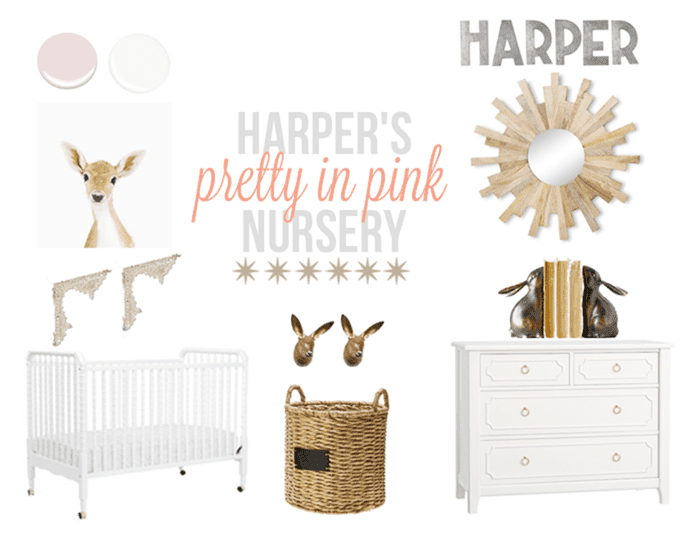
Thankfully the wall color is actually ok, a pretty decent warm white, so it stays. Here’s my basic plan below. It’s been helpful to kind of have a loose map of what I’m hoping for the room so when I’m out and about I can quickly decide if something will work or if it’s just cute and I can admire and pass. I’m slowly but surely getting there on this room. Did you see my sneak peek on the gram?
jenny lind/stars/bunnies/dresser/mirror/hooks/baskets/shelves/letters/baby deer
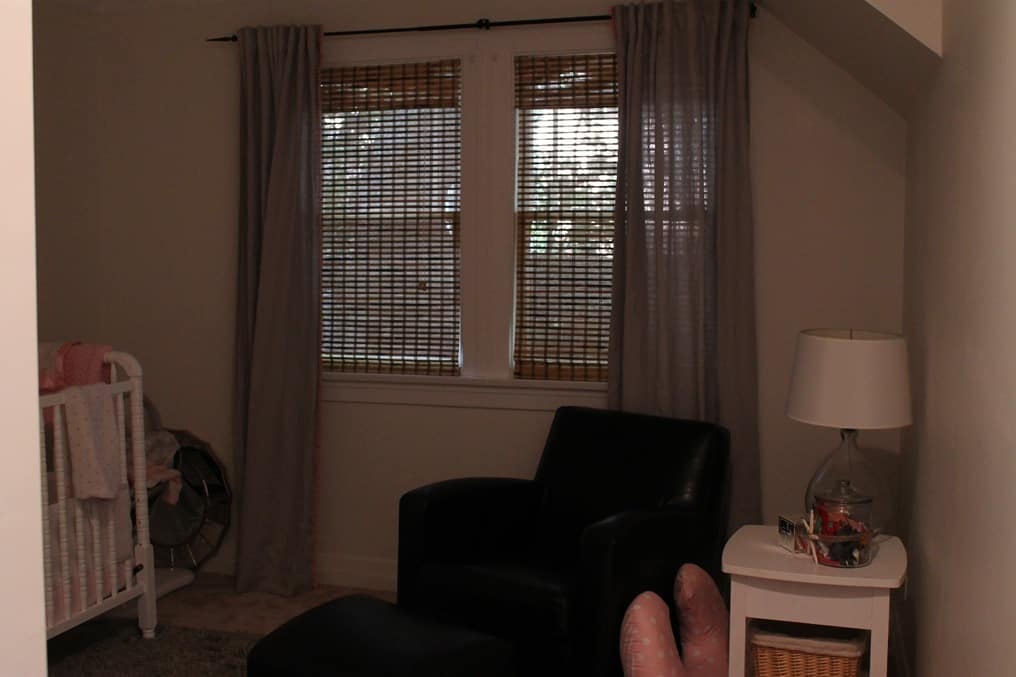
This room is really dark since it faces west with windows only on one side which is not great for photographs but really great for afternoon naps. I added the bamboo blinds to all of the downstairs windows. They were a breeze to put up…like did it all by myself during naptime. The curtains are from IKEA jazzed up with some pink pom pom trim. They are somewhat sheer so if you are looking for more light blocking properties I would suggest adding a blackout liner.The previous tenant left all of their curtain rods. Definitely not my style but the plaster walls have me scared to death to remove/patch/bolt anything to the walls so they stay. Does anyone have any insight on hanging and securing large items to plaster? I haven’t found anything that works well yet.
I’m planning on taking the rocker out soon since she is sleeping through the night and we’re almost done nursing. I’d love to have a long dresser on this wall on the right, preferably second hand. I need space for the changing table, lamp and the hairbows. The dresser I linked to above is a gorgeous one from PBK but mama doesn’t have that in the budget. I’m also wouldn’t mind having an unpainted wood dresser. I think it might add some warmth and contrast to the space. I have been scouring the thrift shops and Craig’s List but no luck yet. I’m just hanging all of her tops and dresses and stick her leggings in a basket for now. It’s not beautiful but is perfectly functional so I’m not in a hurry to fill up the space.
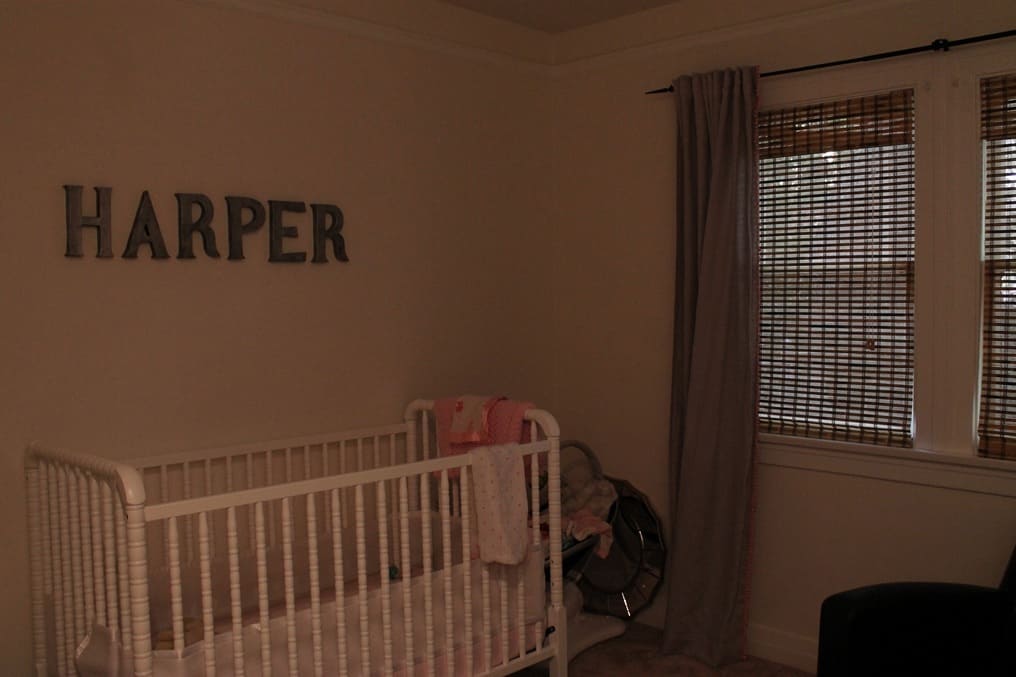
I love our crib. We snagged it on Amazon when it was less than $200. It’s simple and girly and I love it. I used Emily’s tutorial for the faux zinc letters. I just couldn’t bring myself to hang metal above our baby’s crib since we live in earthquake country. The mirror is finally up and can I just derail for a moment? I like it but have had my eye on this one from World Market for a sweet forever but no ma’am I am not paying $135 for an accent piece in my baby’s bedroom. So I found the current mirror at Hobby Lobby for $29 and WHAT SHOWS UP AT TARGET THE NEXT WEEK? The exact mirror I want for $39. For the love.
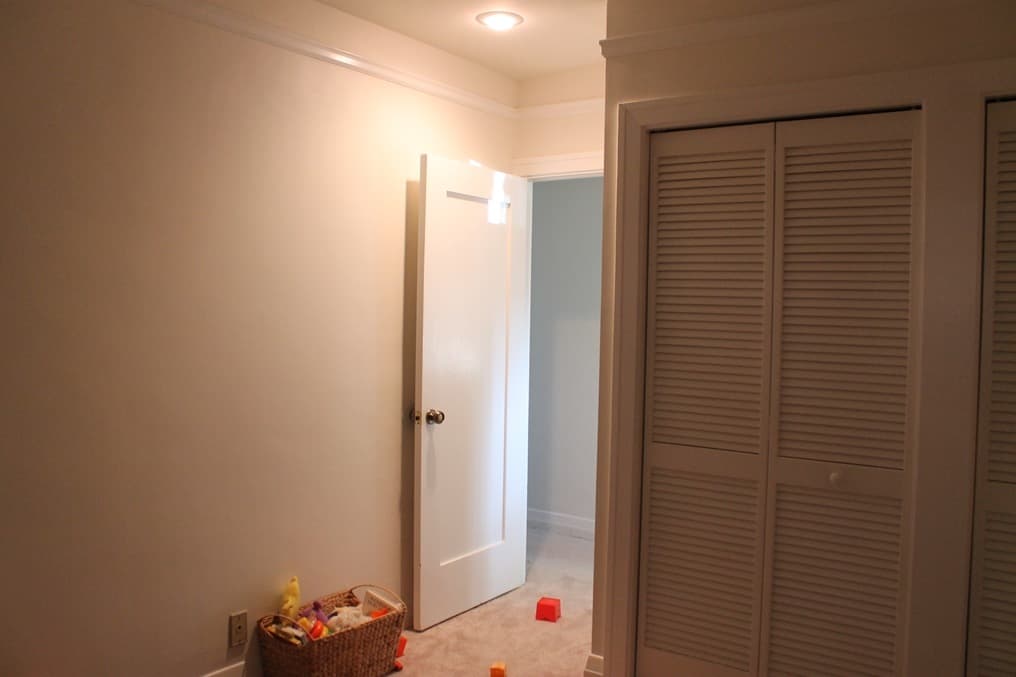
I took this picture standing in front of the crib looking at the door. You can see that the wall on the left is really long and totally empty. Once I get the dresser in here I’d like to add a Sharon Montrose print and the little deer looks so sweet! I thought maybe a couple of reclaimed wood shelves with the brackets above would be cute to hold trinkets and treasures too. Basically, I need that dresser to finish off this room!
Since I’m not painting I wanted to add some interest in the room and decided on adding metallic gold stars to the ceiling. If we owned the place I would have painted the ceiling a light pink before applying the stars but I really love how it turned out and think it really makes the room. I followed Dina’s tutorial to the letter and it was perfect. I cannot sing her praises loud enough. The woman is insanely gifted with interior design, particularly with children’s spaces. I knocked off another one of her projects in Hudson’s room and am thrilled with the result. I’m planning on whipping up some floor pillows to bring in some pattern and pink to the reading nook. I’d like to hang some vintage hooks for future dress up outfits and what not. Hopefully I can get this room finished up shortly with some after pictures!


