Being due with a baby at the end of November will kick a mother’s rear into gear like nothing else friends. We have tons of birthdays + Christmas (obvs) in November and December so I got started on the kids’ Santa gift really really early this year. Like, I’ve been stashing that sucker in the garage for the last 3 months. You may think I’m a little bit cray (which…) but I am SO glad that I am not out toiling away working on this project with my giant belly right now. My friend Emily requested a post on the before and after and not one to disappoint my tens of fans, I’m happy to oblige.
The kids are getting a tweaked IKEA kitchen and I’m making all my Pinterest project dreams come true. I loved the look of a few I found online, here and here. DISCLAIMER…this project is pretty easy but you know what’s easier (maybe cheaper)? Just buying a kitchen and giving it to them. I toyed with that idea but again with the crazy. I also really wanted a kitchen with a smallish footprint so I could keep it in a bedroom or the sunroom without it taking up all the playspace.
Gather your supplies elves:
Spray Paint: grey (3), white (1) and gold (1)
Kitchen knobs (4)
Thick foam board
LED tap lights (2/3)
Pebbled glass film *optional
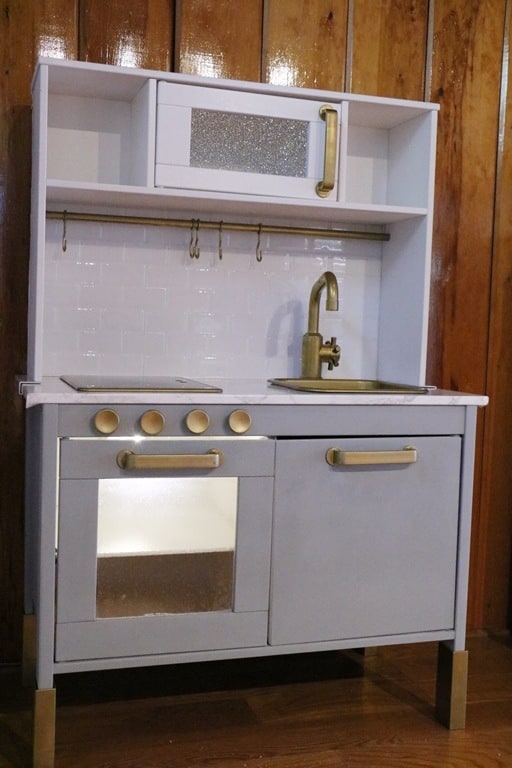
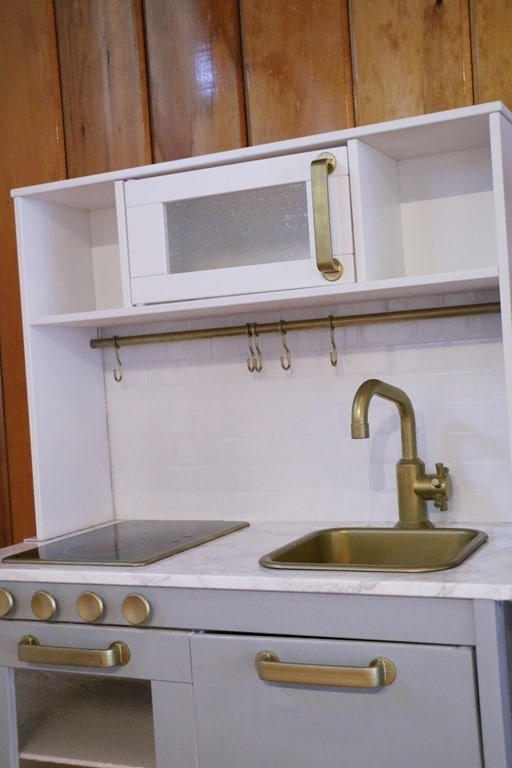
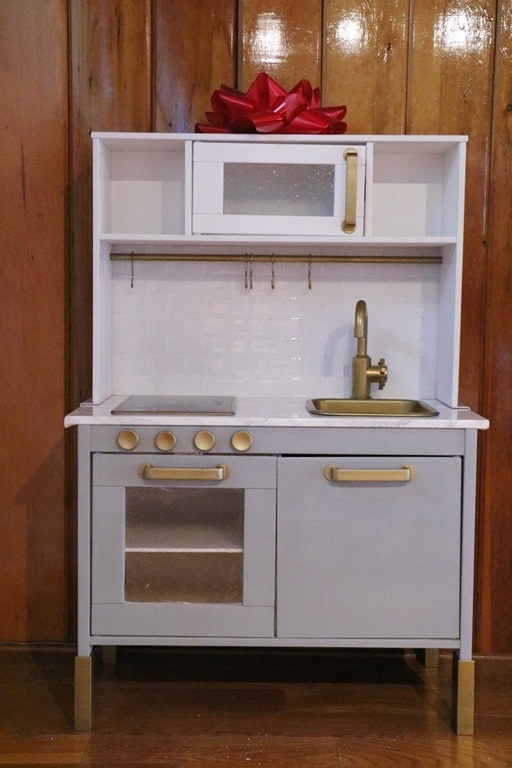
I bought this kitchen and got to work. While everything is unassembled, you’ll want to get painting. I sprayed the bottom cabinets with a grey chalk spray paint. I used the chalk spray paint because I preferred the color in store but I can’t say I would recommend it. It seemed to have a tough time looking even and it took three cans for full coverage. I love the final look because it is matte but be warned, extra work for this.
Next, spray your upper cabinets/microwave portion with white spray paint. You could leave this the Ikea birch look or paint it to match your lower cabinets. Whatever your heart desires here.
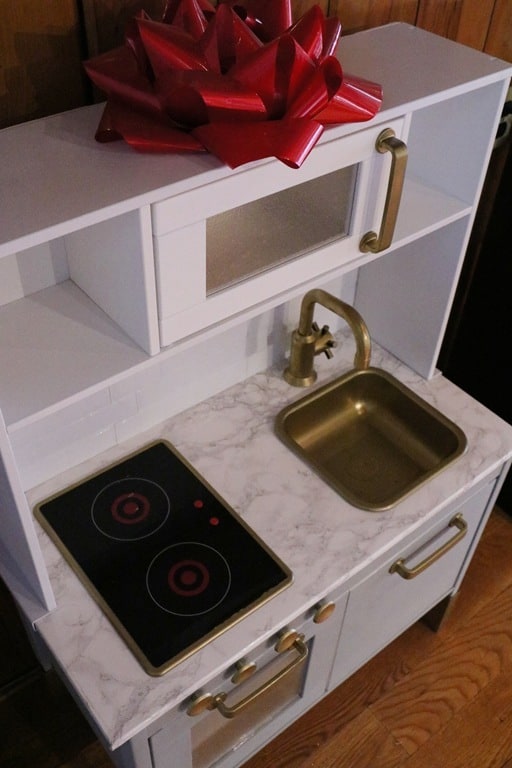
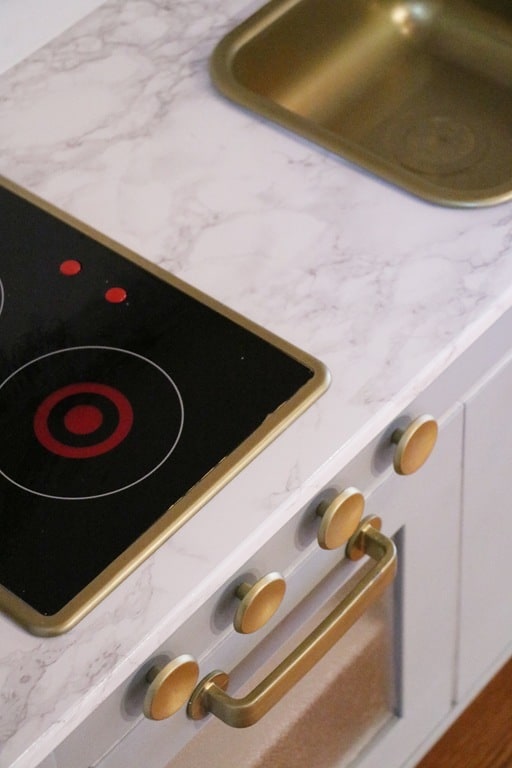
I also sprayed the hardware accessories gold because I can’t be stopped with the shiny things. You can leave them as is (silver) or even replace them with real hardware which looks nice too. I didn’t because I just did not want to deal with the additional cost or work involved. My insanity has limits people. I also sprayed 4 basic (around $1 each) cabinet pulls gold to add on later as oven knobs since the kitchen doesn’t come with any. I couldn’t find the exact knob online because it is so inexpensive but just go rummage around your favorite hardware store to find what you like!
As the paint dried, I adhered the three subway tile panels to thick foam poster board (found at any craft store) for the backsplash. I adhered the marble contact paper at this point too. I will say it’s not perfect around the corners as they are rounded but I like the overall look, plus Santa’s elves are not perfect craftsmen. 😉 I also added pebbled glass film to the microwave and oven windows. This step is completely unnecessary and I probably makes zero difference on the overall look but I had left over film from another project. Waste not, want not!
Put that sucker together friends. I have zero pictures of this process as it was me alone in the garage at night slaving away on this. I would guess it took me about 2 hours to put together by myself. Not a Christmas Eve project!
Use liquid nails to adhere your foam backsplash and let dry overnight. Install your tap lights in the microwave and oven shelves. Last, install your four additional oven knobs. These are super simple to install with a little pilot hole. Mine are actually a bit long for the piece of wood so they spin like real knobs. I find this to be a bonus but you can add washers to the back if you’d prefer them stationary.
That’s it! Totally easy, right?! ![]() Now just spend the next few weeks brainwashing your kids into believing that all the every wanted for Christmas is a play kitchen. Not that I would know anything about that.
Now just spend the next few weeks brainwashing your kids into believing that all the every wanted for Christmas is a play kitchen. Not that I would know anything about that.
Love it! This is LITERALLY nicer than my real kitchen! Southern California, I tell you!!!!